Step-by-Step Guide to Creating and Validating an Event on Insta-Tix 🎟️🚀
Follow these detailed instructions to ensure your event is set up correctly, including venue selection, ticket creation, and organizer details.
👉 Start Here: Create an Event
📝 Step 1: Enter Event Details
1️⃣ Event Title (Required)
Enter the name of your event (e.g., Summer Music Festival 2024 or Comedy Night Live). Keep it short, clear, and engaging to attract attendees.
2️⃣ Event Description (Required)
Provide a detailed overview of your event. Include:
✔️ A brief introduction to the event
✔️ Featured performers, artists, or special guests
✔️ Any VIP access or special experiences
✔️ Important information (age restrictions, parking, refund policy, etc.)
💡 Tip: A well-written description helps increase ticket sales!
📅 Step 2: Select Event Date & Time
Start Date & Time – Select when your event begins.
End Date & Time – Set when your event will end.
If your event runs for multiple days, check the “All Day Event” option.
💡 Tip: Double-check the time zone settings to ensure accuracy!
📸 Step 3: Upload an Event Image
Click “Choose Image” to upload a high-quality promotional image.
Recommended size: 1200 x 600 pixels for best display.
Accepted formats: JPG, PNG, GIF (max size: 250MB)
💡 Tip: Eye-catching images make your event stand out!
🎭 Step 4: Select Event Categories
Choose the most relevant category for your event (e.g., Live Music, Comedy, Food & Drink, Art & Culture).
This helps users find your event easily in searches.
🔖 Step 5: Add Event Tags (Optional)
Tags help categorize your event and improve searchability.
Example tags: Concert, Jazz, Food Festival, Workshop, Networking
Start typing a keyword and select from existing tags or create new ones.
📍 Step 6: Select or Add a Venue
Search for your venue by typing the name in the “Venue” field.
If your venue does not exist, follow these steps to create one:
1️⃣ Type the name of your venue in the blue bar.
2️⃣ The form will expand—fill in:
✔️ Venue Name
✔️ Address, City, and Postal Code
✔️ Phone & Website (if available)
3️⃣ This will add the venue to the database for future use.
💡 Tip: Always search for existing venues first to avoid duplicates!
🎤 Step 7: Select or Add an Organizer
Search for an existing organizer name if you’ve sold tickets on Insta-Tix before.
If you are a new organizer, follow these steps:
1️⃣ Type your name in the blue bar
2️⃣ The form will expand—fill in:
✔️ Organizer Name
✔️ Email Address
✔️ Phone (Optional)
✔️ Website (Optional)
💡 Tip: If your event has multiple organizers, click “Add Another Organizer”.
🌐 Step 8: Add an Event Website (Optional)
If your event has an official website, enter the URL.
If no external link is needed, you can leave this blank.
🎟️ Step 9: Create Tickets for Your Event
1️⃣ Scroll to the Tickets Section
2️⃣ Click “Add New Ticket”
3️⃣ Fill in the ticket details:
✔️ Ticket Name – (e.g., General Admission, VIP Pass, Early Bird)
✔️ Ticket Description – Explain ticket perks (optional)
✔️ Ticket Type – Choose Standard Ticket
✔️ Start & End Sales Dates – Set when ticket sales open and close
✔️ Price – Enter the cost per ticket
✔️ Capacity – Set a limit for ticket sales
💡 Tip: You can create multiple ticket types for different price levels!
⚙️ Step 10: Advanced Settings (Optional)
Click “Advanced” to access additional options:
🔹 Enable shared ticket capacity (for bundle sales)
🔹 Allow individual attendee collection (for personalized ticket sales)
💡 Tip: These settings customize ticket sales based on event needs!
✅ Step 11: Review & Submit Event
✔️ Double-check all event details for accuracy.
✔️ Ensure venue and organizer details are correct.
✔️ Confirm ticket pricing and availability.
✔️ Click “Submit Event” 🎉
Your event will now be submitted for approval and will go live once reviewed!
📢 Step 12: Promote Your Event & Sell More Tickets!
🎯 Share your event link on social media (Facebook, Instagram, Twitter)
📩 Send an email blast to your audience
🤝 Partner with sponsors, performers, and influencers to spread the word.
Validating Event Tickets at your Event
To validate tickets at your event, follow these steps using the Event Tickets Plus app:
1. Download the Event Tickets Plus App:
For iOS Devices:
- Open the App Store.
- Search for “Event Tickets Plus.”
- Tap “Get” to install the app.
For Android Devices:
- Open the Google Play Store.
- Search for “Event Tickets Plus.”
- Tap “Install” to download the app.
2. Connect the App to Your Website:
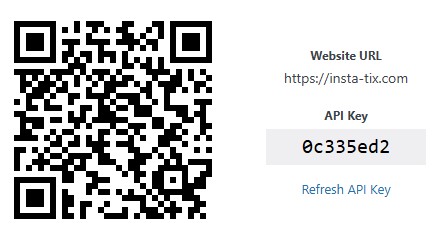
Generate Connection Details:
Connect Using QR Code:
- Open the Event Tickets Plus app on your device.
- Tap on “Scan QR Code.”
- Use your device’s camera to scan the QR code displayed on tihs page.
If you cannot scan the QR code, Connect Manually by following these steps:
- In the app, select “Insert Details Manually.”
- Enter the Website URL and API Key from your WordPress dashboard.
- Tap “Connect Your Site.”
3. Scan Tickets at the Event:
Access Event Details:
- Open the app and select your event from the list.
Begin Scanning:
- Tap on “Check-in Attendees.”
- Use your device’s camera to scan the QR codes on attendees’ tickets.
Check-In Confirmation:
- Upon scanning, the app will confirm if the ticket is valid and mark the attendee as checked in.
- If a ticket has already been scanned, the app will notify you to prevent duplicate entries.
Important Notes:
Internet Connection: Ensure your device has a stable internet connection during the event for real-time synchronization.
Multiple Devices: You can use multiple devices with the app to scan tickets simultaneously. Each device should be connected to your website using the steps above.
🚀 Need Help?
If you have any questions or need assistance, contact Insta-Tix Support!
Now you’re ready to host an amazing event and sell tickets hassle-free! 🎟️🔥


